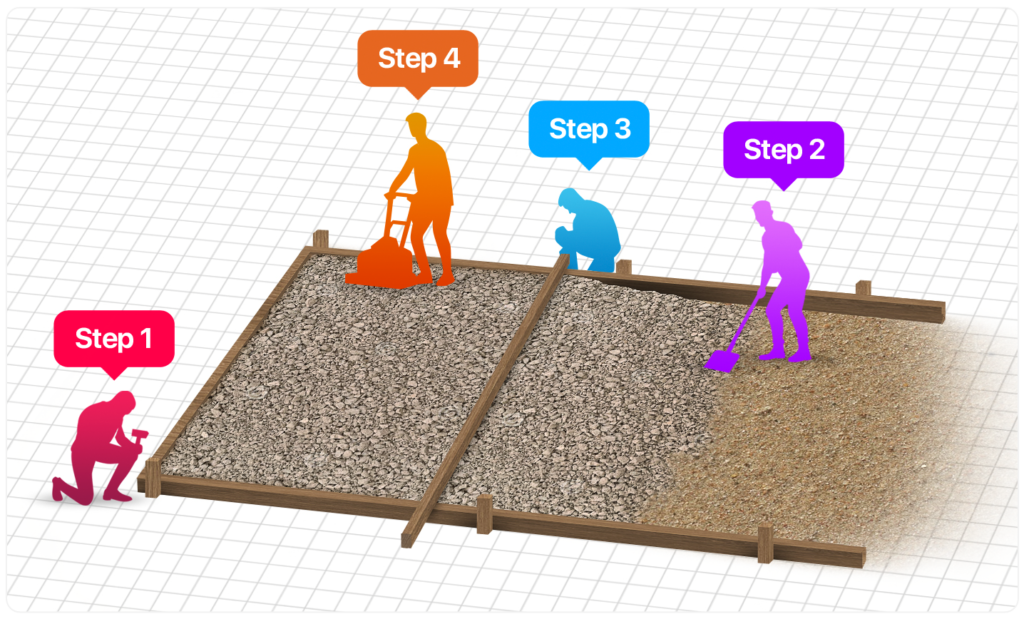
Step 1
Note: Build your foundation with an extra foot around your building which creates a drainage bed for water run-off. This perimeter helps hold the stone from falling onto the grass. This also keeps mud from splashing against the sides of your building.
To construct a three-sided frame larger than the building using straight 2″ x 4″ lumber, follow these steps:
By following these steps, you can successfully build a three-sided frame that surpasses the building’s dimensions, using 2″ x 4″ lumber. Remember to prioritize accuracy and precision during the construction process.
Step 2
For optimal outcomes, it is recommended to utilize class 5 gravel or crushed rock as it facilitates effective water drainage away from the building. Follow the steps below to fill and level the frame: Acquire class 5 gravel or crushed rock, ensuring its suitability for drainage purposes. This material will assist in directing water away from the building.
Step 3
Begin filling the frame with the gravel or crushed rock, distributing it evenly throughout the area. Use a rake to ensure a consistent and level surface. Pay attention to maintaining an appropriate level by periodically checking with a level tool. This step is crucial to ensure proper water drainage and stability. By following these steps and utilizing class 5 gravel or crushed rock, you can efficiently fill and level the frame, facilitating effective water drainage away from the building.
Step 4
To compact the base of the frame, there are two effective options: using a compactor or employing a sprinkler method, provided you have sufficient time for drying before the building arrives. Follow the instructions below:
By choosing either the compactor or sprinkler method, you can effectively compact the base of the frame. Each method has its advantages, so select the option that best suits your requirements and time constraints.

We will answer any question you have, and will serve you with honesty and integrity.
"*" indicates required fields

For directions, check out the Locations Page or click on the map.
60328 430th Street
Mountain Lake, MN 56159
Phone 507-427-2002